
Using a drill machine is not rocket science. You can easily use the drill to enhance the beautification of your homes for beauty. You can use the small drill bits while working at home to make prototypes of board material.
Nowadays, drilling into stucco material or walls at home is very popular. People use the power drill to enhance the beauty of their homes. You can use a power drill for domestic purposes and as well for industrial purposes. Many industries making prototypes use power or cordless drill machines.
A drilling machine is an essential piece of equipment for every home. You don’t need to pay bills for small work if you have a drill machine. You can do drilling in any material at your home. You only need to choose the right drill bit.
Keep reading the article to learn the step-by-step procedure for using a power drill. We hope you will enjoy reading this blog.
Step-By-Step Procedure to Use a Drill:
- Please Charge the Battery:

Let’s take the example of a cordless drill. The cordless drill works with a battery. While you need to charge a battery, you must remove the battery from the cordless drill. The battery has its docking unit. After snapping the battery in the docking unit, connect the docking unit to the socket. After charging the battery, snap the battery back.
- Selection of Drill Bit:

Drill bits have various diameters. The drill bit for power and cordless drill is available in small to large sizes. The size of the drill bit depends on the user. The user knows how large a hole is; the user needs to drill.
Drill bits are available in different shapes. Every material requires another type of drill bit. Choose the drill bit according to your material and the size of the hole you need.
- Removing or Changing the Drill Bit:

You can remove any drill bit using the same method. It doesn’t matter if it’s a Philips bit or a spade bit. There’s a button on the side that determines the direction that the bit is spinning.
You can remove the bit by pressing the bit inside. Now by pressing the button, grab the chuck. The little round cylinder is a chuck. Grab the chuck firmly and press the trigger. You will feel the trigger losing its grip around the bit. The chuck determines whether you are loosening or tightening the bit.
- Fix the Drill Bit in Drill:

Many drills don’t require a chuck function to remove or fix the drill bit. You can settle in the drill bit by pushing the drill bit in the drill and moving it in a clockwise direction. After putting in the drill bit, you can tighten the bit by moving the collar of the drill in the opposite direction. Some chuck has a separate key available.
The key is T in shape. You need to put the key in the chuck and move it the same as you open the door lock. Chuck has meshes in it that grip the drill bit. While rotating the T shape key, the meshes will start to loosen. After loosening the meshes, you can easily change the drill bit.
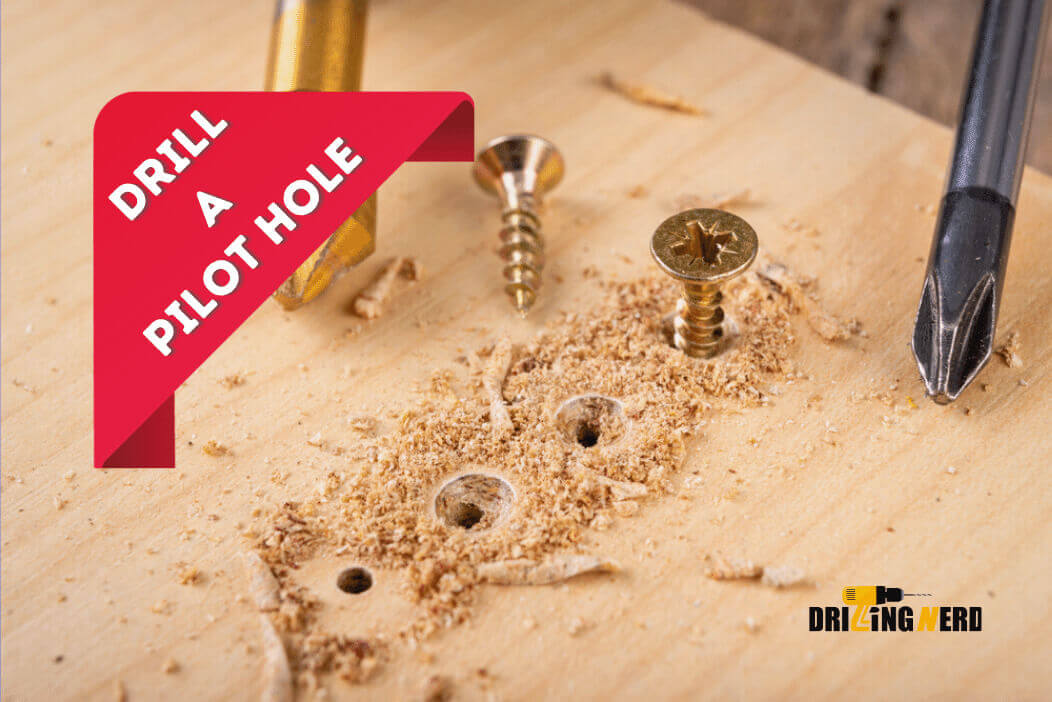
- The Pilot Hole Is Optional:

You must drill the pilot hole to tighten the screw. If you need to fix the screw directly into the material, there is a risk of cracking or damage. It is advisable to drill a pilot hole before.
The pilot hole must of the size of a screw. If the pilot hole is a little bigger than the size of the screw, you need to put the wall or board anchor into the material. The anchor will reduce the diameter of the hole.
- Place the Drill Bit on the Marking:

You must mark the location where you will drill. Place the drill bit over the marking.
- Start Drilling:

Drill machines have various speeds of drilling. You can speed up or speed-down speed down by using the button. The speed is the rotation of the drill bit. Place the drill bit on the marking and press the trigger.
The drill machine will start drilling. Gently apply pressure on the drill machine towards the wall so it can drill into the wall. We recommend that you begin drilling at a low speed.
Parts of Drill Machine:
Chuck: The portion of the bore that clamps down on the penetrate bit or driver bit. Typical old drills often require a unique key to open and close the chuck.
Trigger: We use a trigger to turn on and off the drill machine. Most drills include a pressure-sensitive trigger, which implies that light weight will enact a moderate speed, whereas heavy weight will deliver an extra speed.
Motor: The motors help the drill bit and chuck to rotate. Speed also depends on the motor. While you require a slow pace, the motor slows down.
Grip: The grip of a drill is precisely like a pistol. The grip of the drill is made up of anti-slip material.
Various Kinds of Drills:
Drills come in a variety of designs, including manual and electric drills. Drills typically have two functions: selecting bits and adjusting drilling power. Below is a list of various drill types.
Hammer drills: The hammer drill has much power. Due to its rotatory and hammer movements, the hammer drill is perfect for drilling into concrete, metal, and stone blocks.
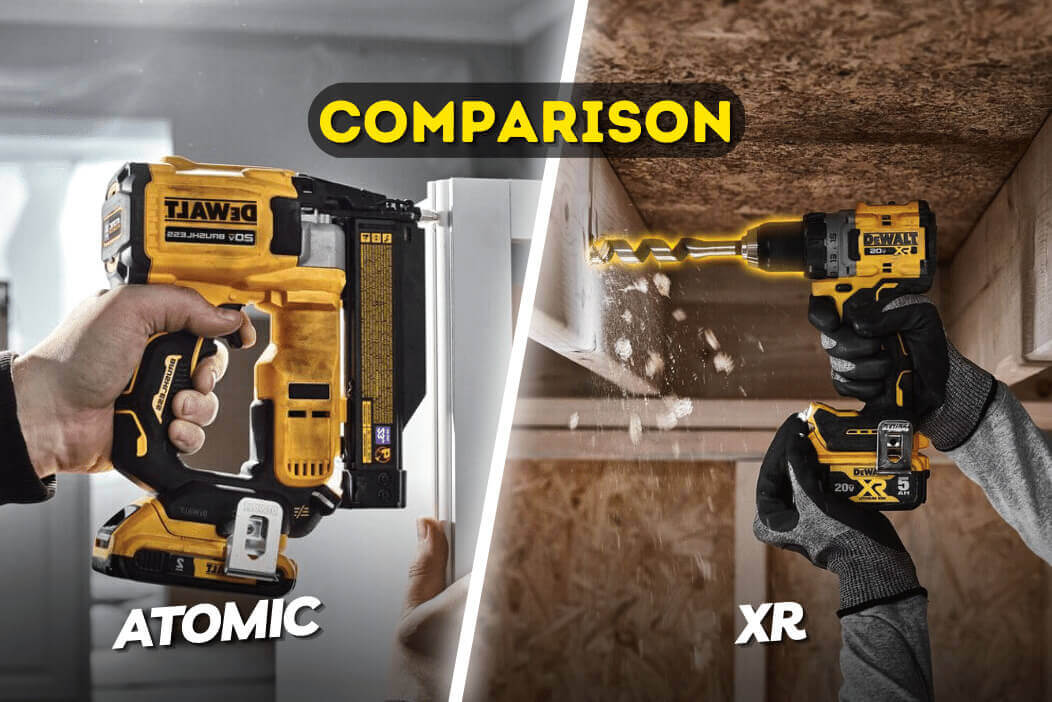
Cordless drills: A cordless drill is also lightweight and easy to handle. Due to its lightweight, it is ideal for people who lack arm strength or need to perform tasks in small spaces. In comparison to other drills, these drills are very lightweight. You get a battery with this drill. It is a battery-powered drill that can manually adjust the drill power; however, you cannot use it on concrete or hard surfaces. You do not need to worry if the power socket is away from your workplace. You can use the batteries. The long-term solution is to get extra batteries for your drilling machine so you do not run out of power.
Corded drills: You need the electric supply for the corded drill. It has a grip resembling a pistol, making it easy to hold. The corded drill produces much more torque than the cordless drill. The corded drill is more powerful than the cordless drill. It isn’t easy to handle the long wire of a corded drill.
Various Kinds of Drill Bits:
We use a variety of drill bits when drilling. Drilling into the stucco exterior typically involves masonry bits or carbide hole cutters. These are mainly used at home, but plenty of commercial bits exist.
Masonry bits: The masonry bits are much strong than the carpentry bits. While drilling into concrete or bricks, you can use masonry drill bits. The arrow resembles a masonry drill bit hit. Masonry bits have spirals around its body. The spiral helps the user to remove the dust and concrete from the hole. The masonry bit is available in multiple sizes.
Carbide hole cutter: In powerful drill machines, you can use the carbide hole cutter bit. The corded drill machines are more powerful than the cordless drill. You can use a carbide cutter if the hole size is big.
Flat drill bit: We can use the flat drill bit for drilling into carbon steel. The price of the flat drill bit is cheap. You cannot use the flat drill bit for drilling on iron.
Flute drill bit: This drill is only in some households. It has flutes on it. Professional workers use the flute drill bit. You can use this drill bit on copper or brass.
Difference between Drill and Drivers:
These stubby drill-shaped tools are familiar to everyone. Yet every tradesperson we know owns and regularly uses one of these tools. Homeowners still need to be more precise on how the drivers differ from a typical drill.
The impact driver and cordless drill both have rotary tools in the shape of guns that are used to turn various types of bits, but how those bits are turned can vary significantly between the two devices. A cordless drill is a rotating device. The drill bit shaft is clamped down by the drill using chalk and its jaws. The drill’s motor rotates the bits with constant torque.
The drills are great for boring the holes. The size of the drill bit depends on the size of the hole. The power drill gives a constant rate of spin to drill bits. These drill bits help you to bore in wood or another surface.
You can use drivers to tighten the screws. The primary function of drivers is impressive. It saves a lot of time. The drivers deliver a lot more force than the standard drill.
What Should You Know While Buying a Drill Machine?
If you buy a drill machine for home use, you can go for a cordless one. Technically corded drill machine has greater power than a cordless drill. The cordless drill is best for home use. You can use it wherever you want without dragging an extension cord. If you intend to use your drill for an extended period, you can easily keep an additional battery handy to get through.
Safety Requirements:
Safety is a prerequisite for happiness, so you must use safety gear when using power tools. Sharp edges on power tools have the potential to scar your skin. Keep your drill and other drilling equipment out of children’s reach.
Wear protective gear while working, including gloves, helmets, and safety shoes. Most importantly, a fire extinguisher must be close by if you’re working with electrical equipment.
Frequently Asked Questions:
Bottom Line:
A drilling machine is a flexible tool you can use for various jobs. You can use it to drill holes in a variety of materials. You can use a drill to cut screws and other fasteners and enlarge existing holes. Drilling equipment is available in various sizes, from compact handheld models to large, powerful versions.
Choosing the appropriate drill bit for the job is crucial when using a drill machine. The wrong bit selection can harm the workpiece or the drill machine itself. Choose the appropriate drill bit for the material you are working with because different materials call for various drill bits.
The next step is inserting the drill bit into the drill machine. Typically, you can do it by tightening the chuck, a part that secures the drill bit in place. The drill machine is ready to use once you lock the bit in place.
It is crucial to take safety precautions before drilling. Put on safety glasses or goggles to shield your eyes from flying objects and gloves to protect your hands from the heat the drill produces. You must prevent movement while drilling and stand on a flat surface to maintain balance.


